這篇紀錄在 docker busybox 中使用 shell script 同時執行多個指令,比較使用 & 將命令帶到背景執行與在前景執行時的狀況,如理解有誤也歡迎糾正。
程式碼放在 github: https://github.com/zeroLR/concurrency-on-sh
實驗環境
- Mac M1
- Docker 20.10.17
- Docker Compose 2.2.3
- Docker Image:
busybox:latest
建立實驗環境
建立資料夾 。
1
2
mkdir concurrency-on-sh cd concurrency-on-sh執行以下指令產生本次實驗檔案。
 1
 2
 3
 4
 5
 6
 7
 8
 9
10
11
12
13
14
15
16
17
18
19
20
21
22
23
24
25
26
27
28
29
30
31
32
33
34
35
36
37
cat << 'EOF' >> foreground.sh #!/bin/sh sleep 3 ; echo "First job has been completed." sleep 9 ; echo "Next job has been completed." sleep 6 ; echo "All jobs have been completed." EOF cat << 'EOF' >> background.sh #!/bin/sh sleep 3 & echo $! sleep 9 & echo $! sleep 6 & echo $! wait -n echo "First job has been completed." wait -n echo "Next job has been completed." wait echo "All jobs have been completed." EOF cat << 'EOF' >> zombie.sh #!/bin/sh for i in `seq 1 10` do sleep 10 & echo $! done wait EOF使用 docker 或 docker-compose 啟動 container,將實驗檔案 mount 至 container 中。
1
2
# docker command sudo docker run -dti --restart always --workdir /home --mount type=bind,source="$(pwd)/",target=/home --name busybox busybox ash1 2 3 4 5 6 7 8 9 10 11 12 13# concurrency-on-sh/docker-compose.yml version: "3.1" services: busybox: container_name: busybox image: busybox:latest stdin_open: true tty: true restart: always working_dir: /home command: ash volumes: - .:/home1 2# docker-compose sudo docker-compose up -d開啟兩個 shell ,都使用 docker exec 進入 container 的 shell 中。
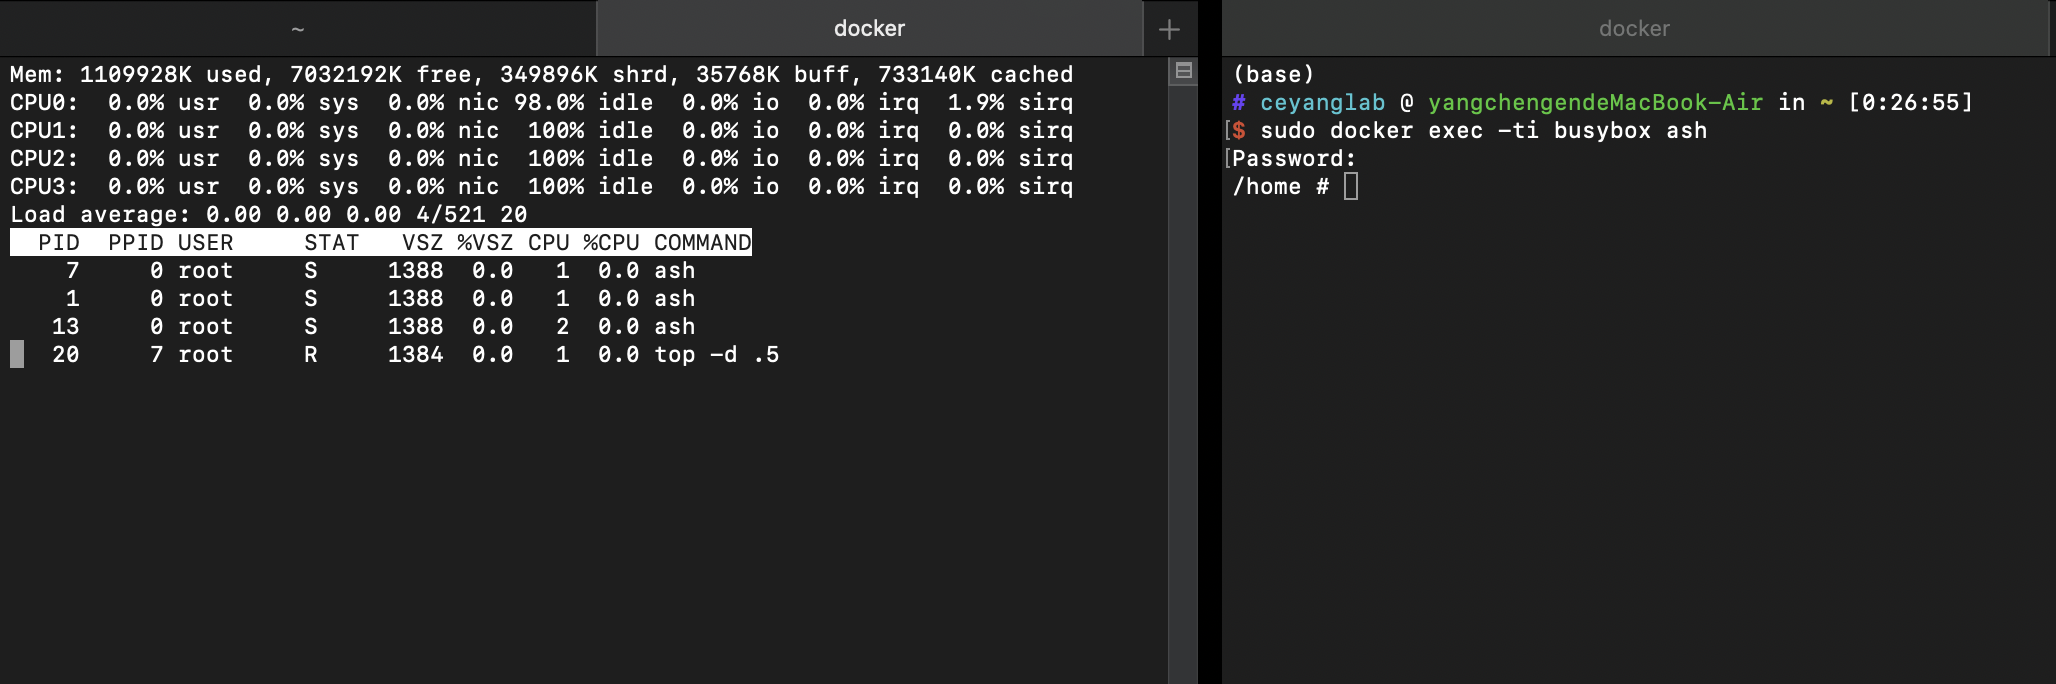
1sudo docker exec -ti busybox busybox ash其中一個 shell 執行 top 開啟系統監視(按 1 可以顯示各個 CPU 資源),待會實驗時方便觀察 process 的增減過程。
前景執行
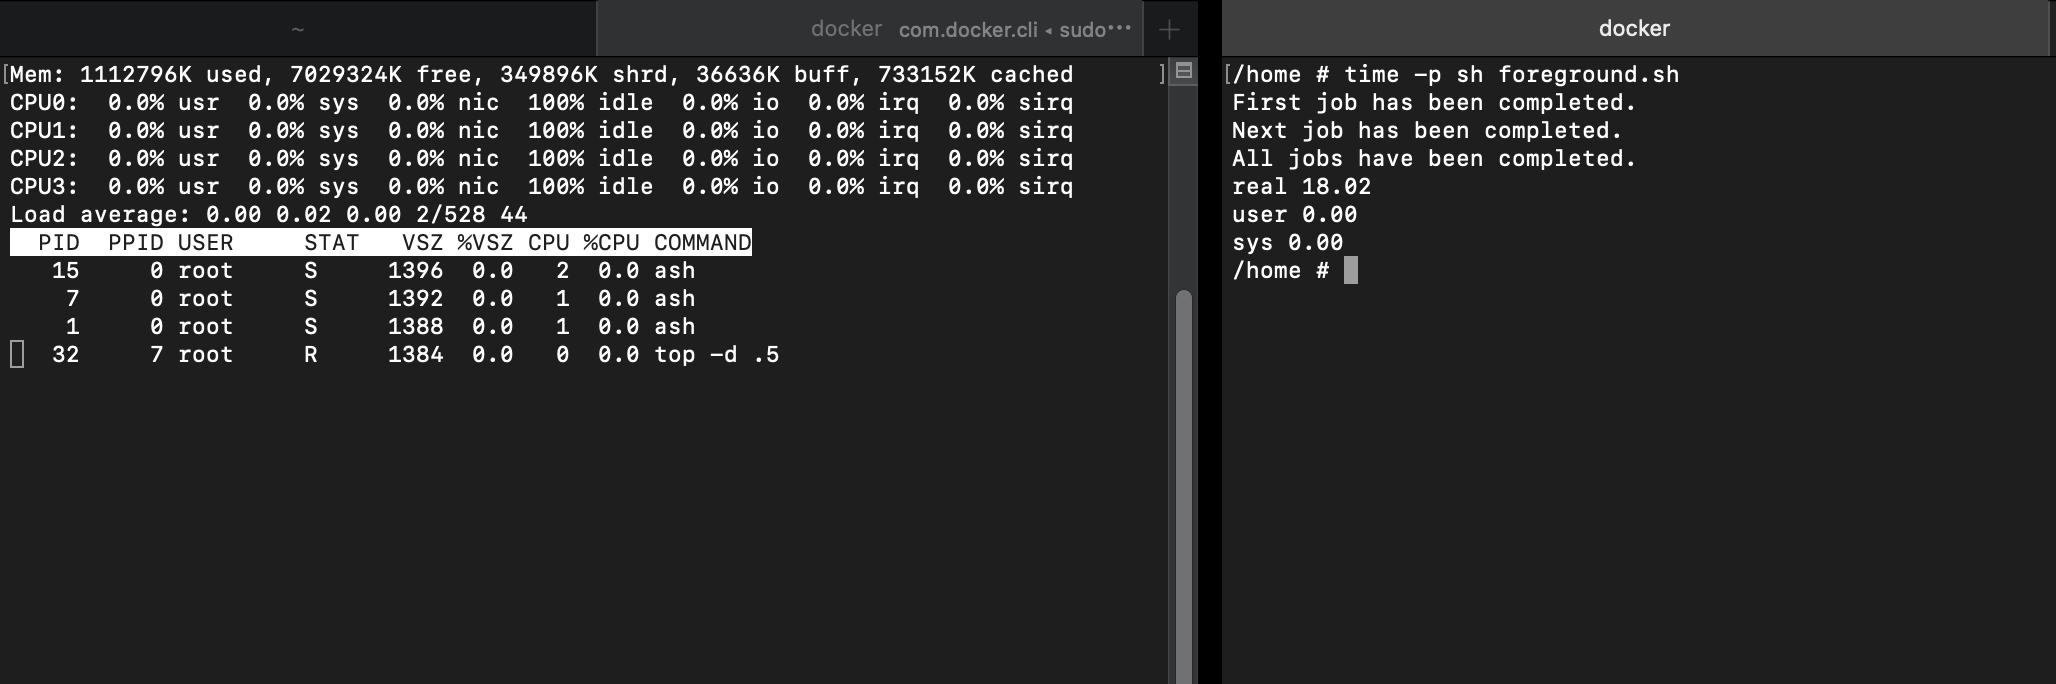
一般在 shell 中未加上 & 的命令就會放在前景處理,且一次只會處理一個 process,使用 shell script 執行多個命令時,也是一次只產生一個 process:
| |
使用 time -p 執行命令,會將 time -p 後的命令作為其子程序執行,再由這個子程序作為父程序執行 shell script ,產生出新的程序(有點繞口 XD),待所有子程序都執行完畢後,回傳從程序執行到結束所經過的時間。
第一個子程序等待 3 秒:
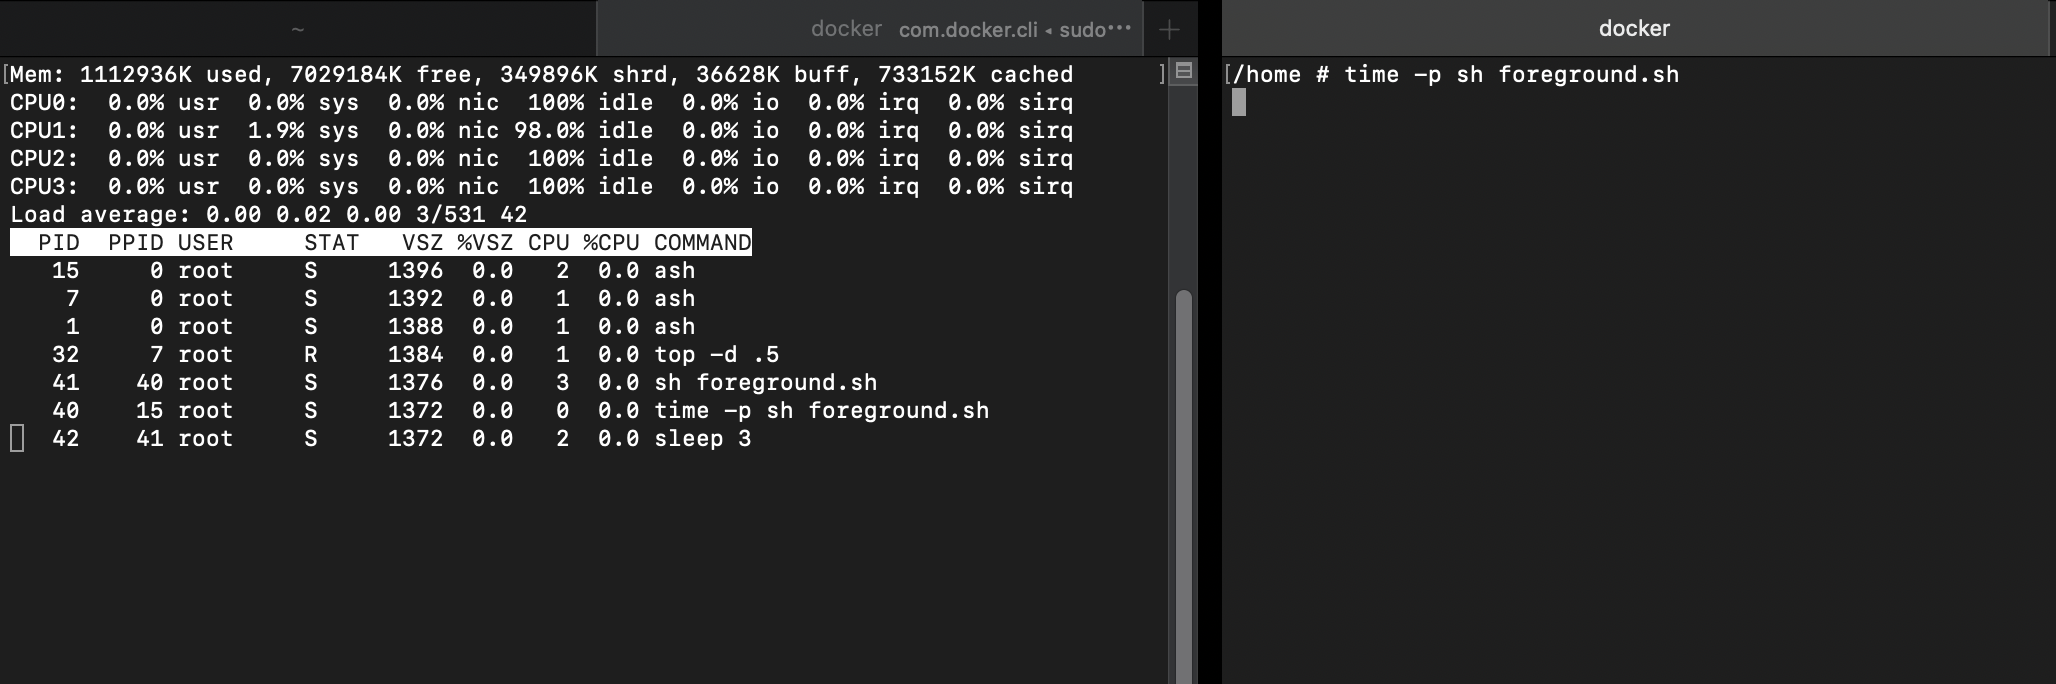
開始第二個子程序等待 9 秒,回傳第一個子程序結束後執行的訊息:
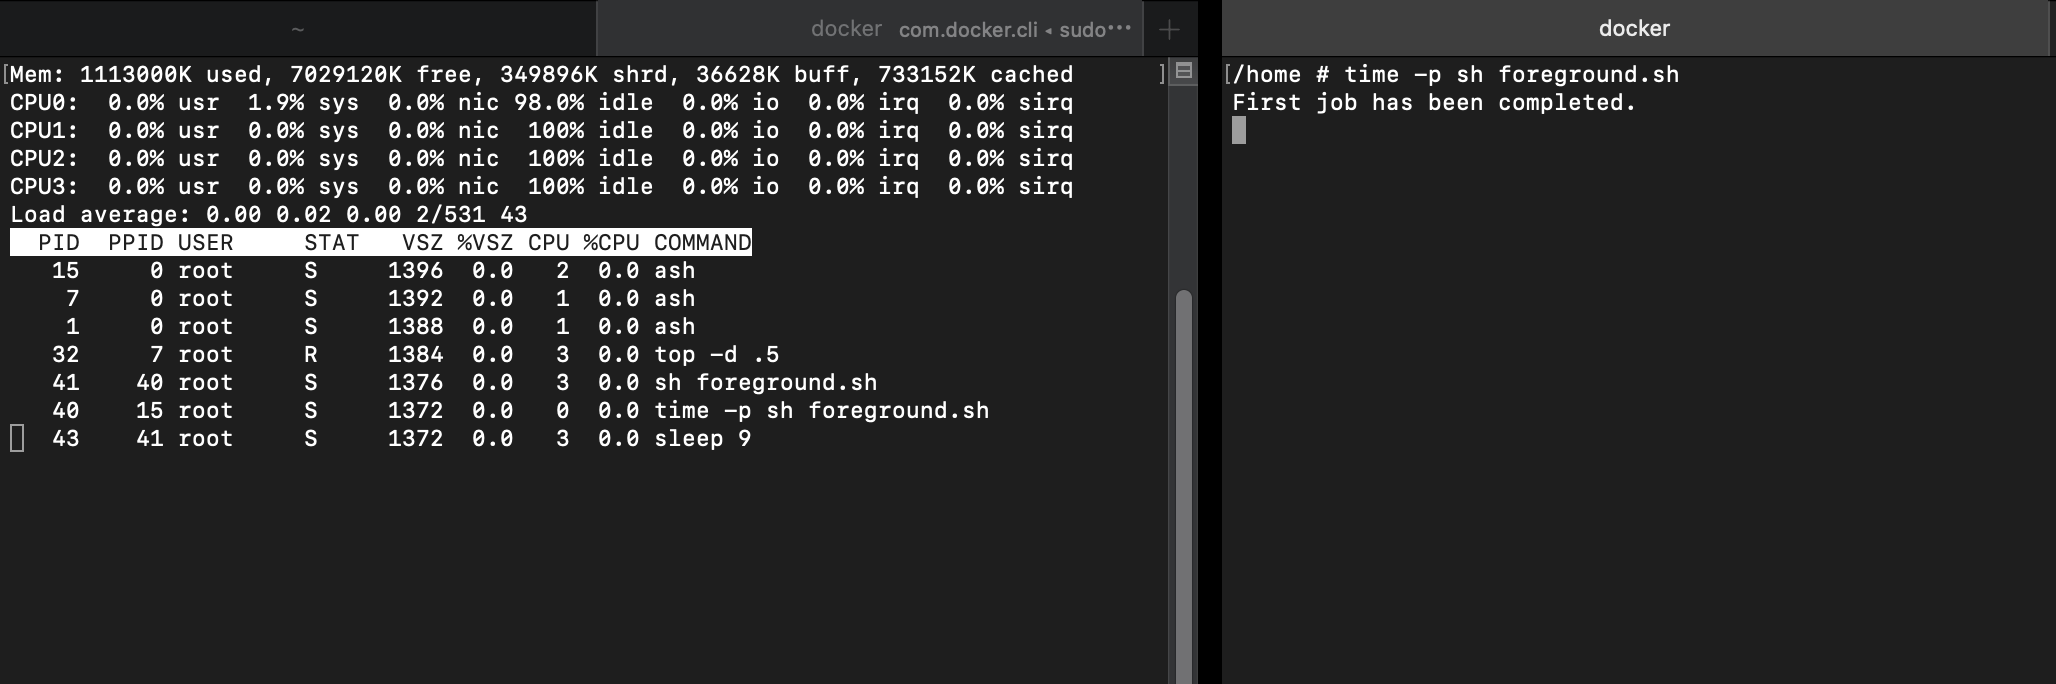
開始第三個子程序等待 6 秒,回傳第二個子程序結束後執行的訊息:
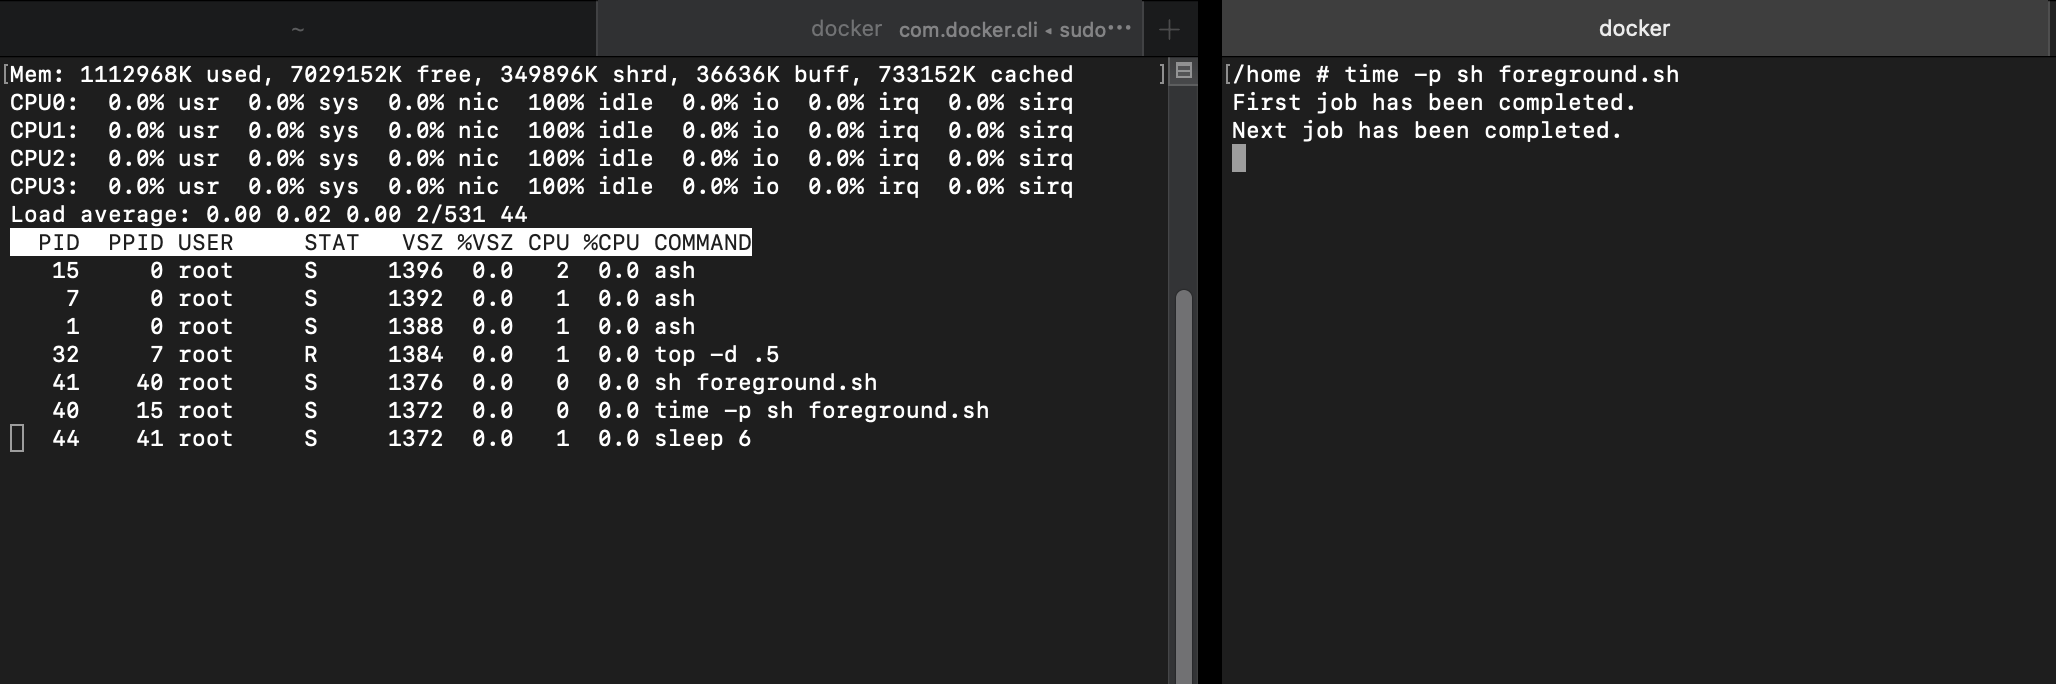
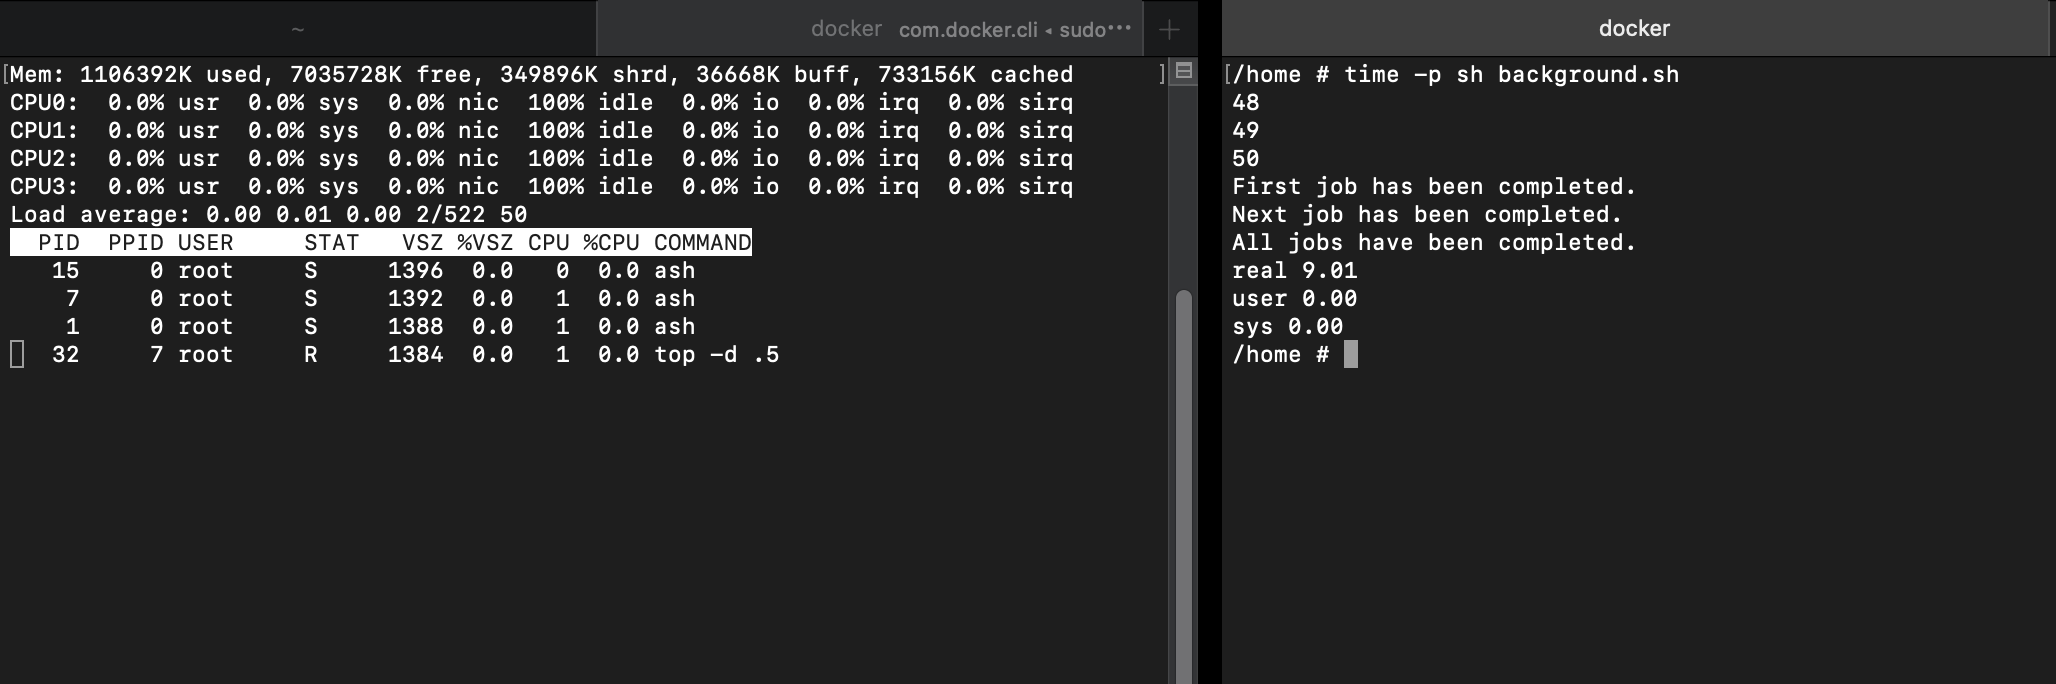
所有程序結束,回傳訊息與執行時間,總共花費 3+6+9 = 18 秒:
背景執行
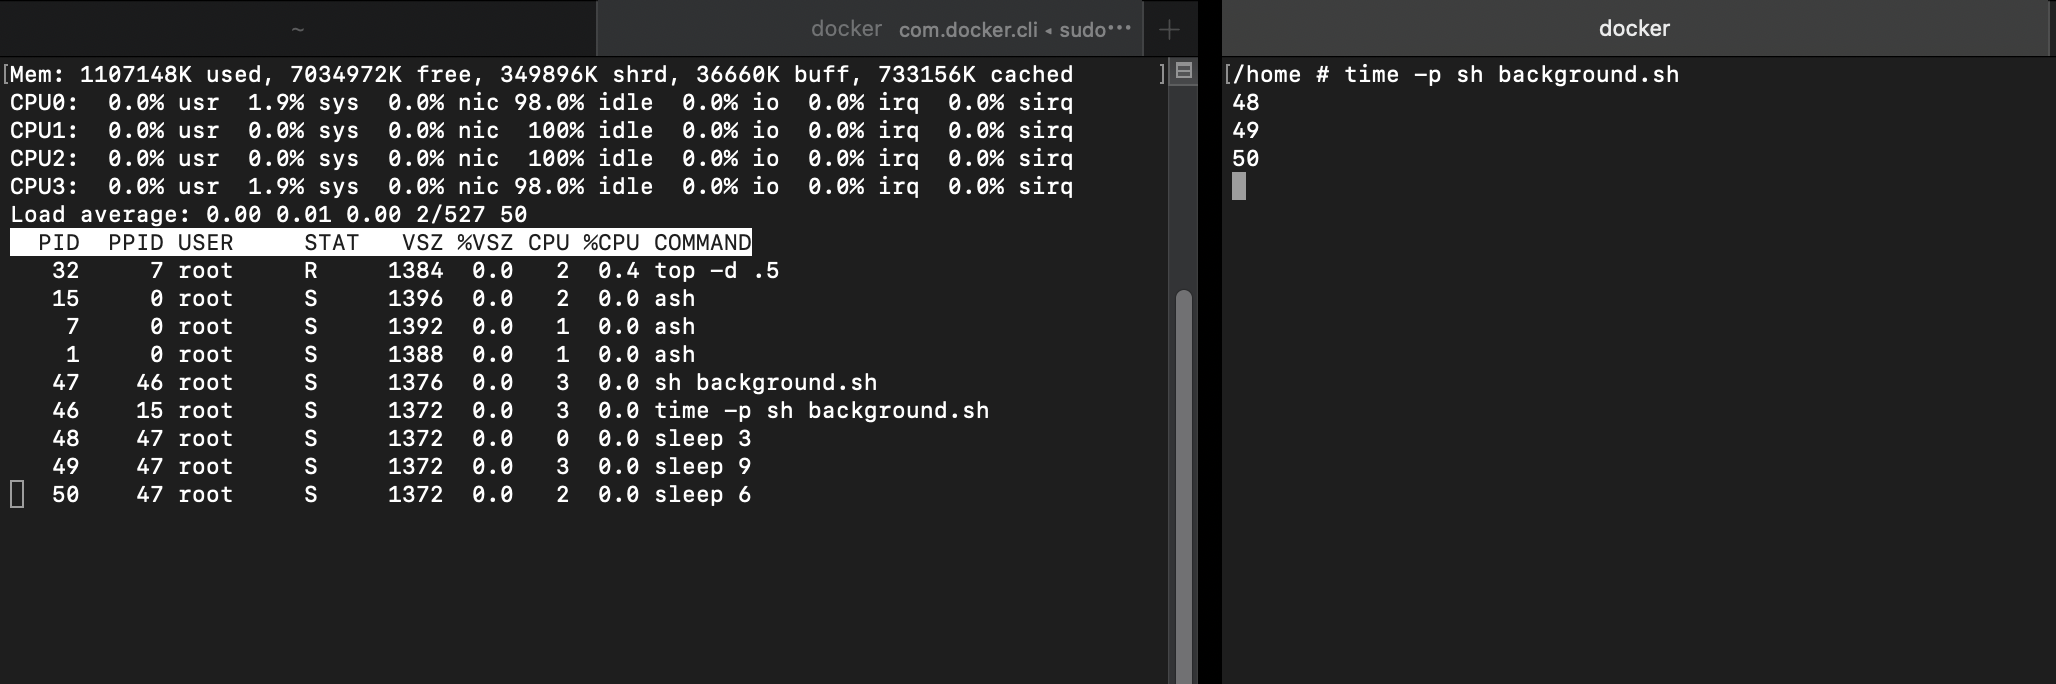
現在將前景執行的命令放到背景執行,並回傳子程序 PID,使用 wait 等待程序結束:
| |
同時產生三個子程序,放在背景由 Linux 去做並發或平行處理,其中 CPU 的欄位表示當下這個程序是由哪個 CPU 處理的:
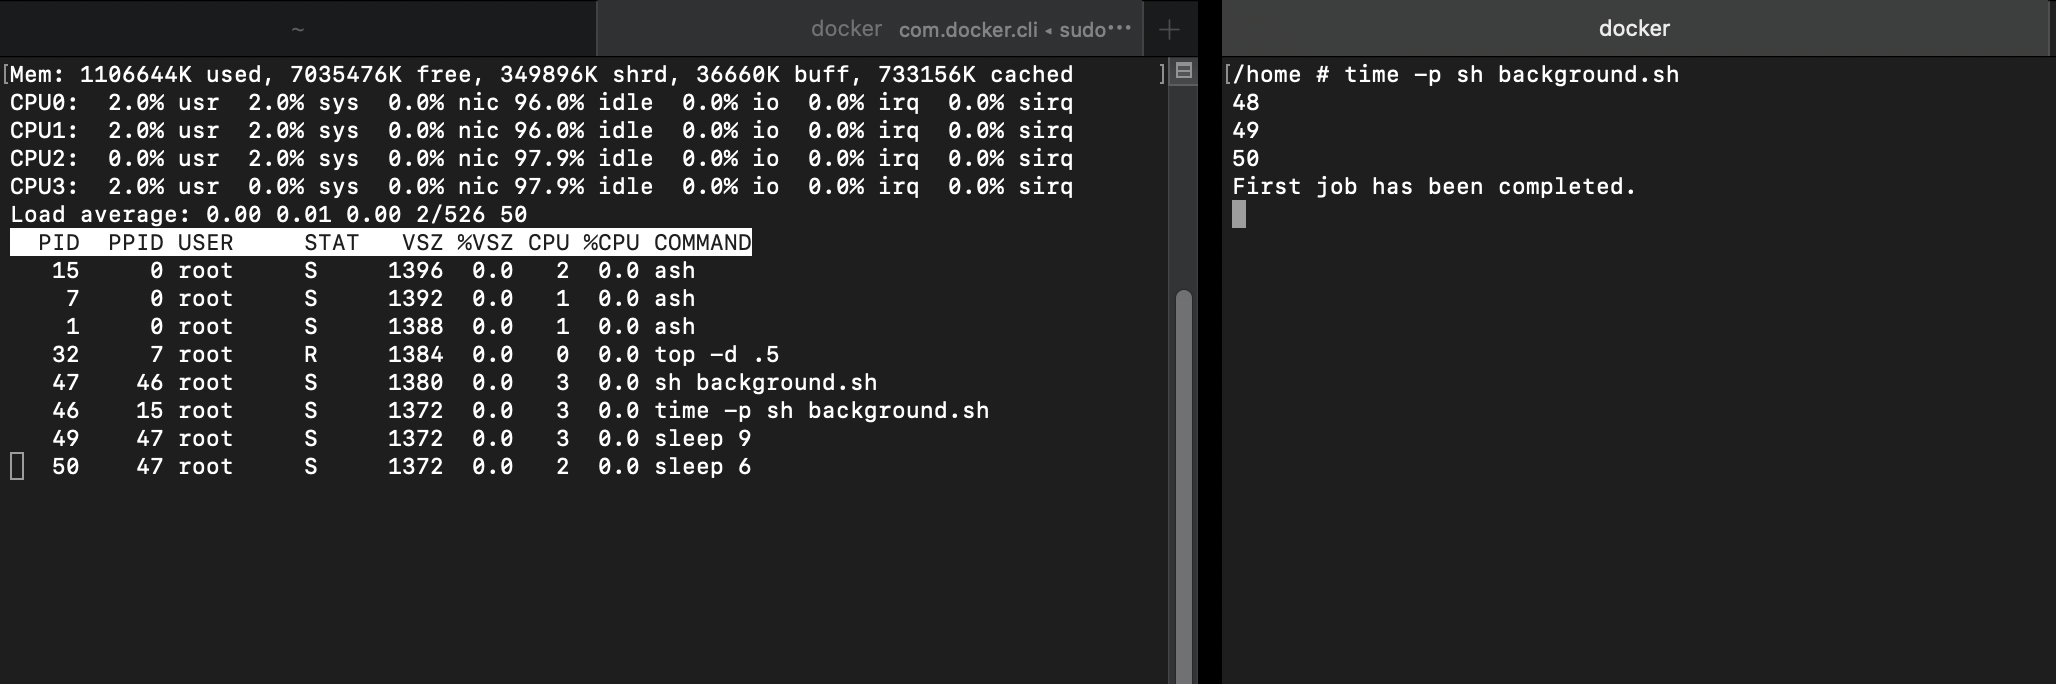
第一個子程序結束,此時其他子程序繼續倒數中:
第三個子程序先結束了,因為已經倒數完畢:
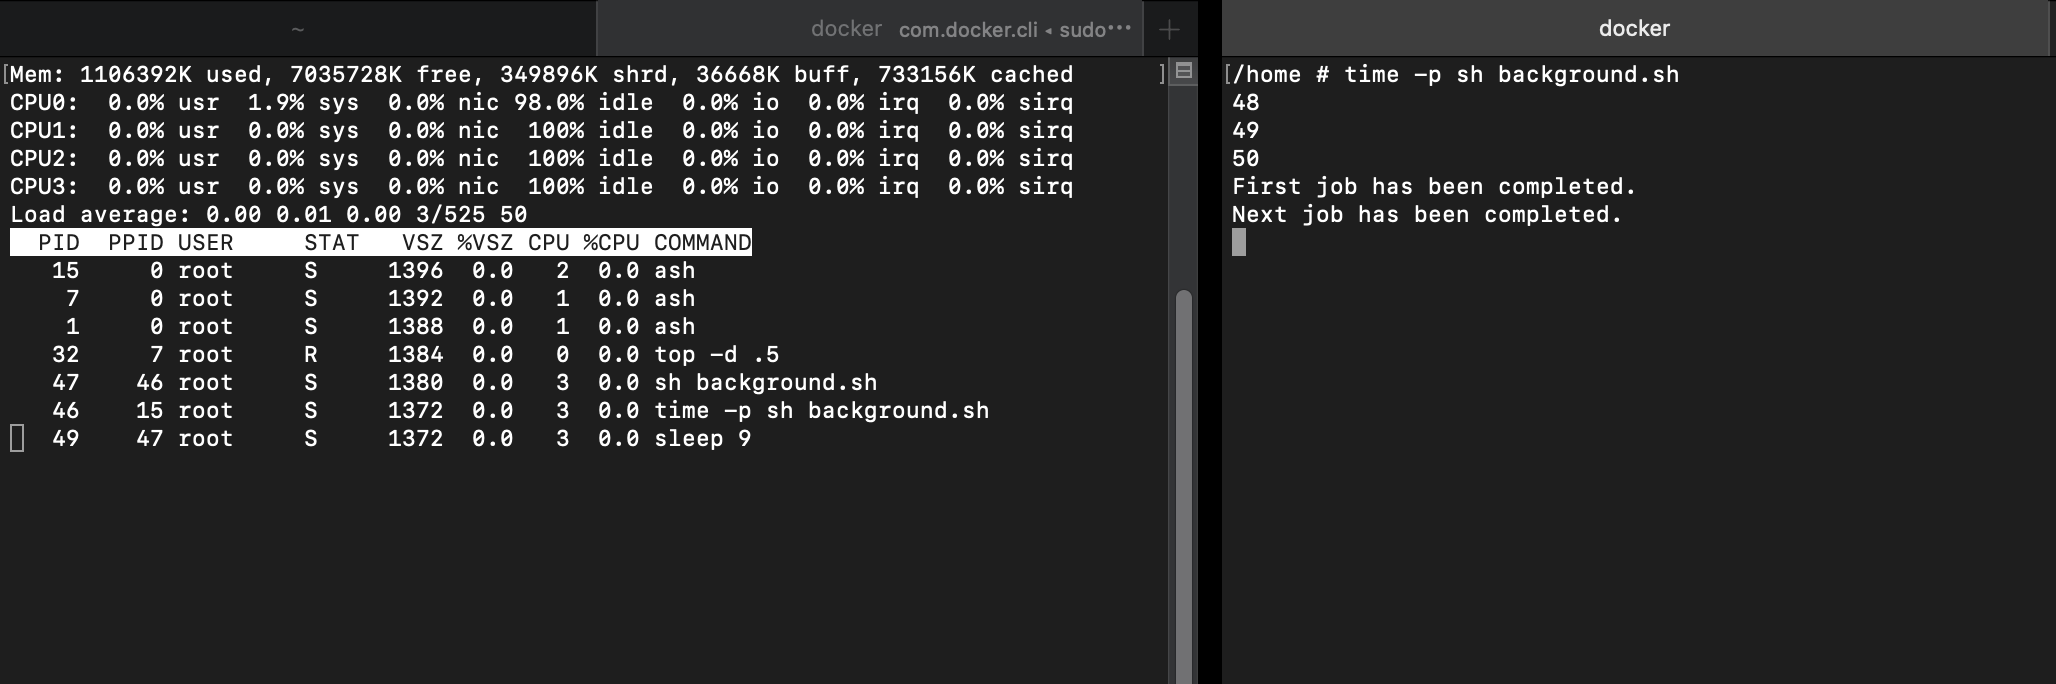
最後第二個子程序結束,總共花費 9 秒:
這邊的例子及命令的量都舉得很少,建議可以自己試試用 for loop 去產生大量的命令執行,不過還要考慮單核及多核的系統上處理的差異喔! 可以參考 Concurrency 程式設計 - HackMD 。
殭屍程序
程序被正常回收
我們先來看看有正常使用 wait 等待程序結束的狀況:
| |
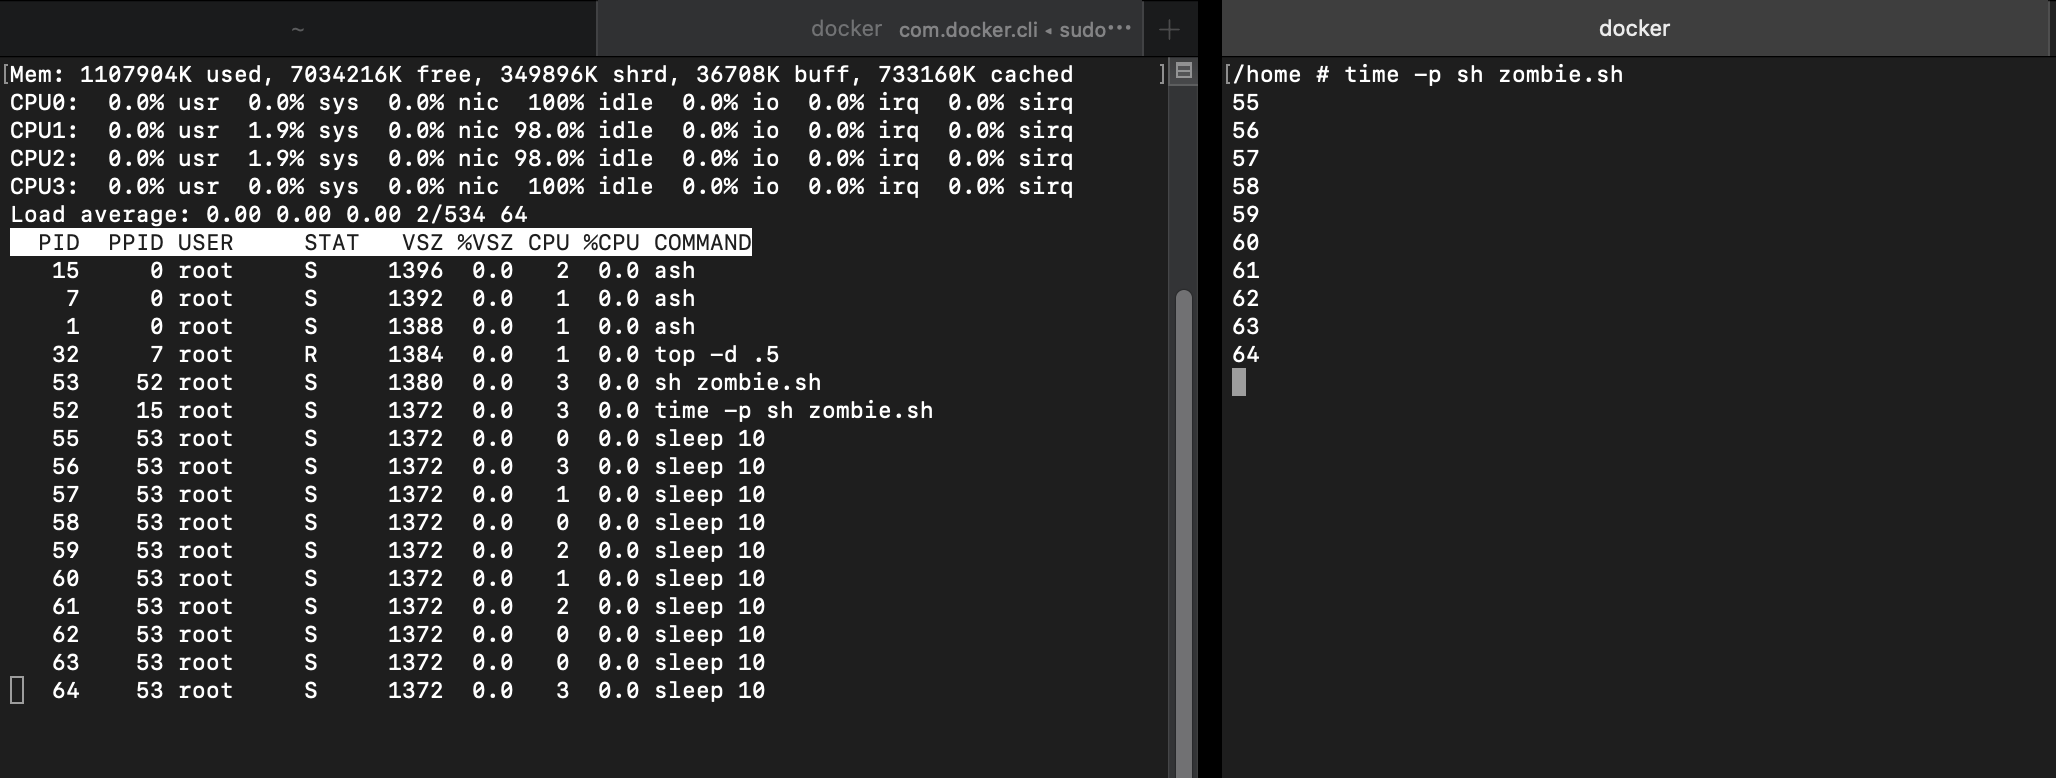
命令執行中,echo 先將所有已產生程序的 PID 顯示出來,觀察以下結果 :
- 每個程序的 PPID(父程序) 是誰,父 產生(→) 子
- container →
shell(ash) shell(ash)→time -p sh zombie.shtime -p sh zombie.sh→sh zombie.shsh zombie.sh→sleeptime -p sh zombie.sh程序在前景執行並等待中
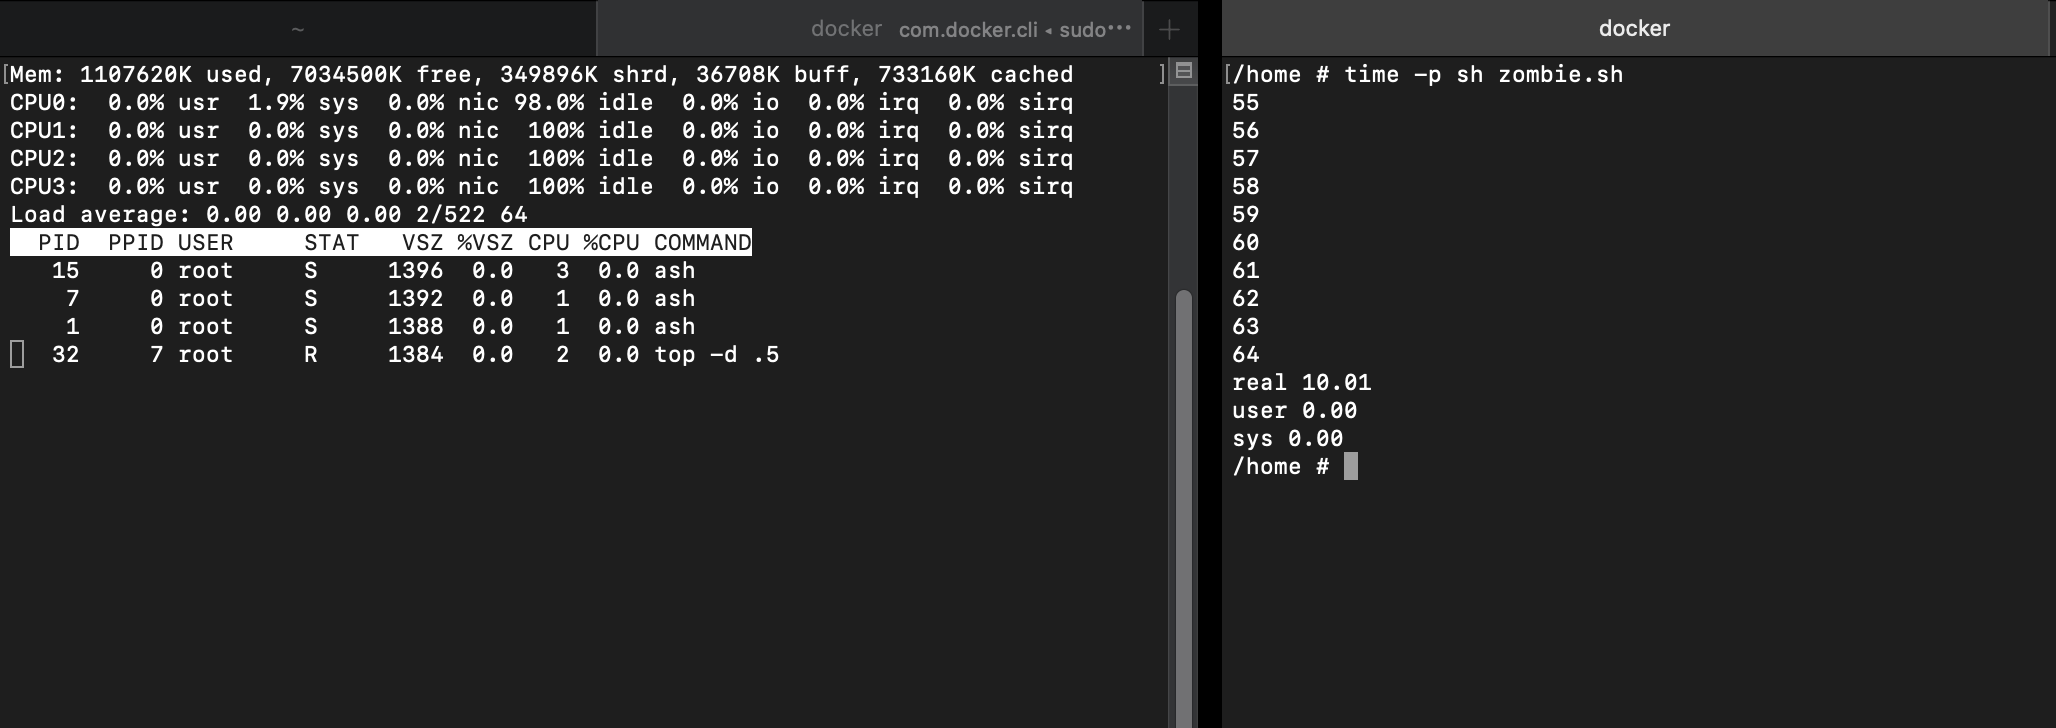
命令結束,所有結束的子程序都被其父程序回收,程序執行時間共約 10 秒(並發執行):
程序結束後未被父程序回收
再來試試不使用 wait 時,程序執行完的狀況:
| |
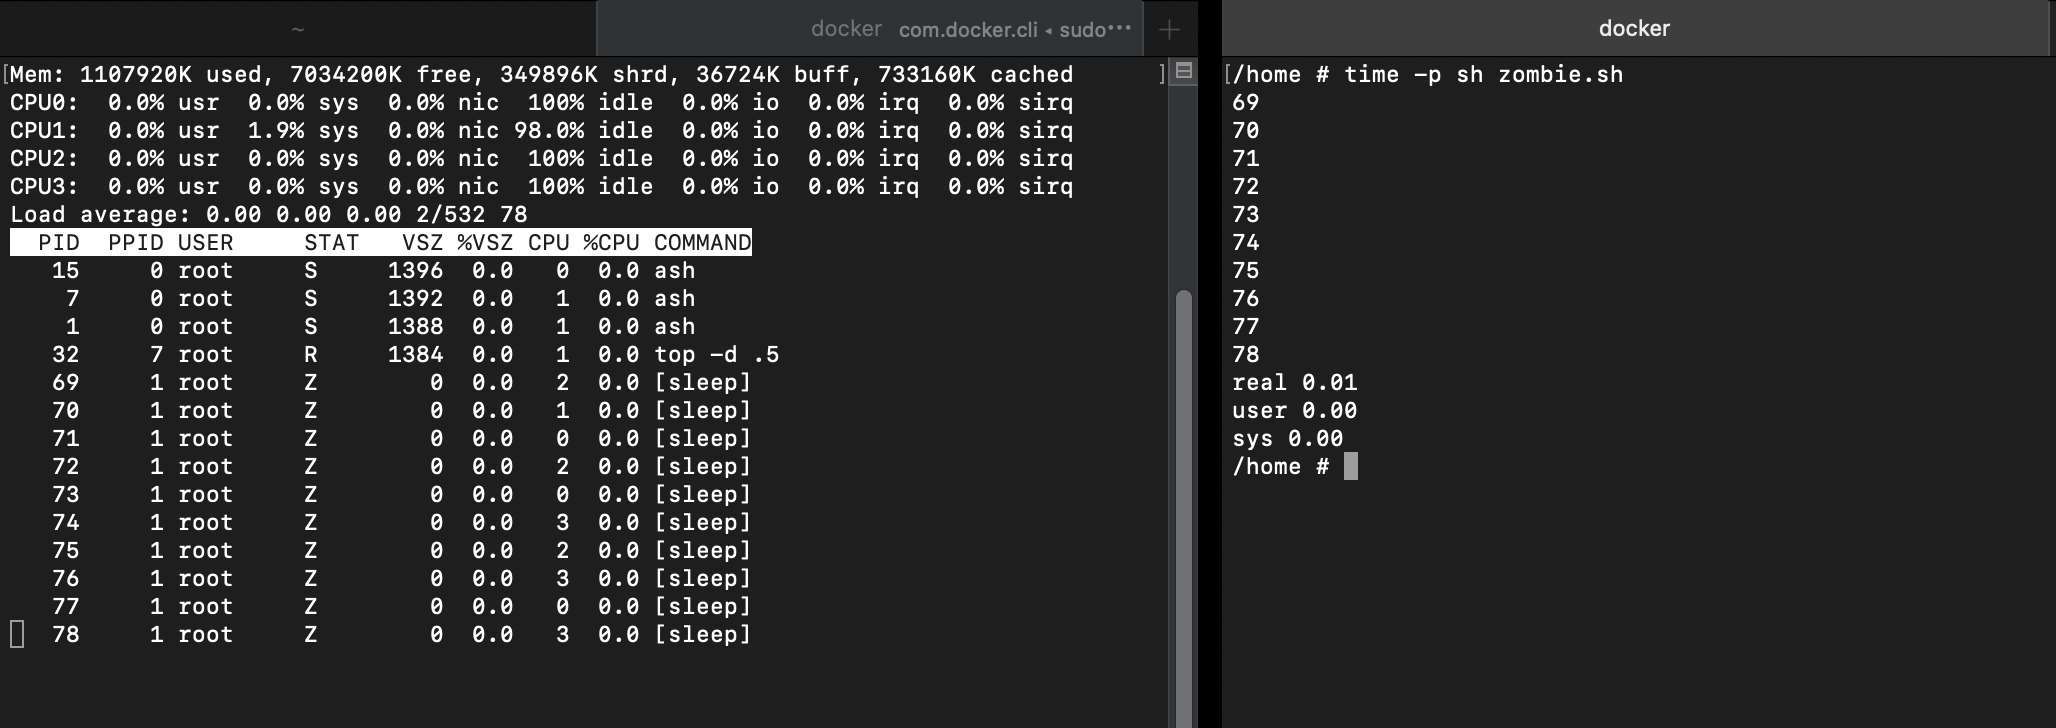
命令執行後馬上結束,與前面的狀況有些不同:
- 程序執行時間約 0.01 秒,這邊的執行時間只包含
time -p sh zombie.sh及sh zombie.sh程序 - 每個
sleep程序其 PPID 為 1,而這個 PID 為 1 的程序是 container 建立後產生的第一個程序,也就是最前面 docker run 時的 command 所產生的
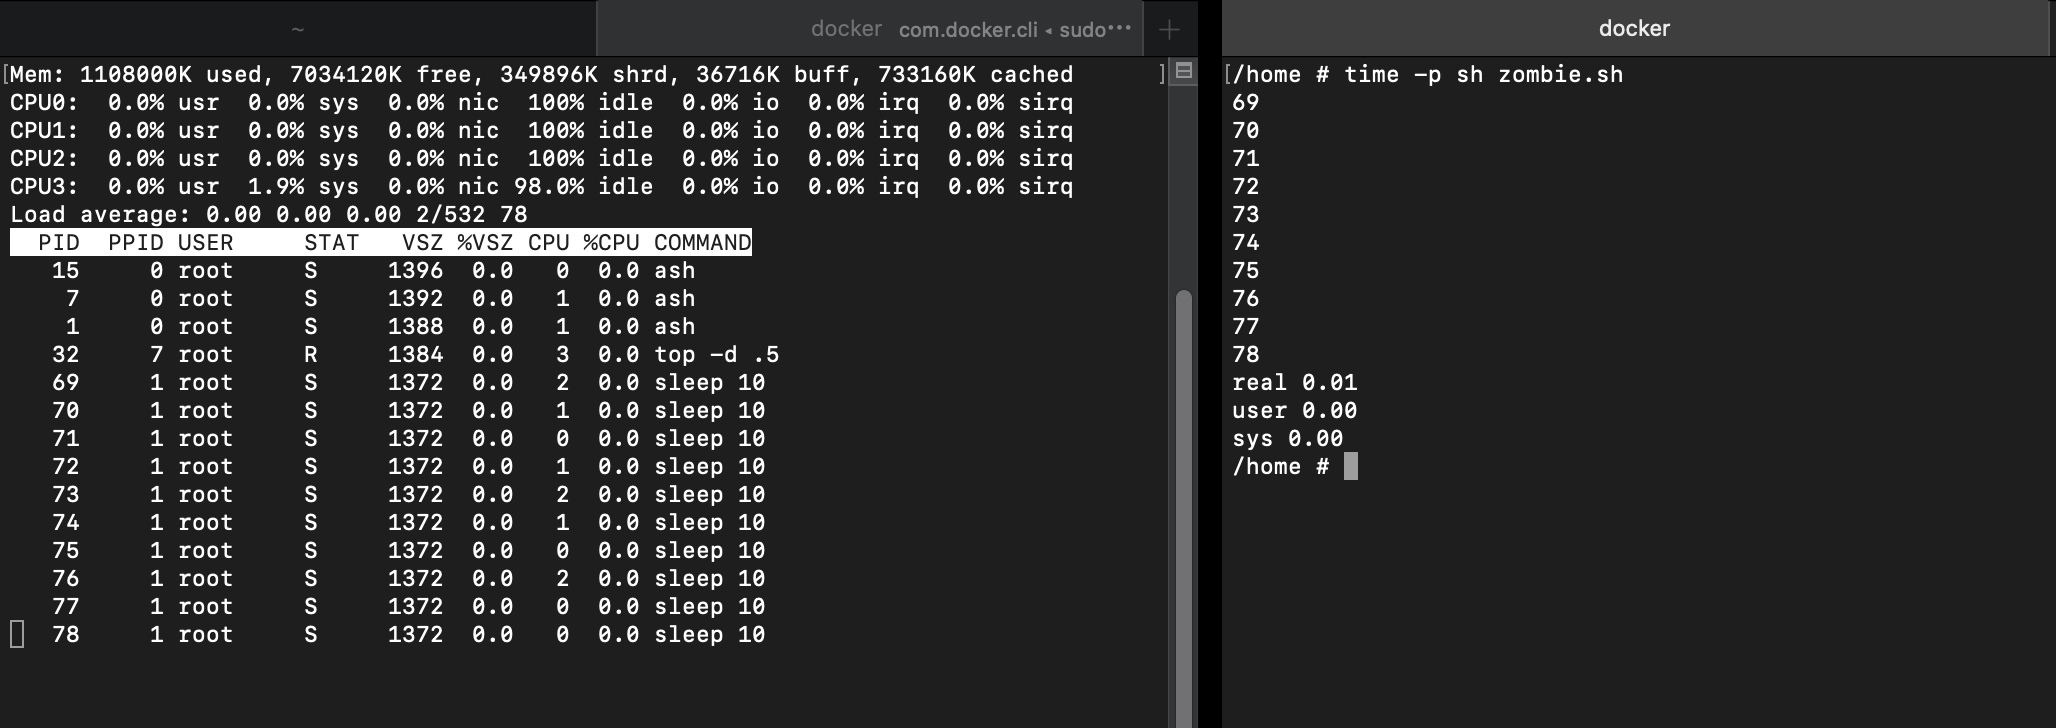
程序結束後,其父行程沒有回收子程序,子程序變成 殭屍程序:
那麼為什麼沒用 wait 就會讓程序變成由 PID 1 的程序來產生呢?
我們從 wait 的 manual page 中可以得知 :
If a parent process terminates, then its “zombie” children (if any) are adopted by init(1), (or by the nearest “subreaper” process as defined through the use of the prctl(2) PR_SET_CHILD_SUBREAPER operation); init(1) automatically performs a wait to remove the zombies.
喔~由於未使用 wait 去等待 zombie.sh 產生的背景程序執行完畢,所以執行 zombie.sh 的當下程序就結束了,產生出來的子程序找不到爹,最後就被隔壁老王 init(1) 收養了(X,而這個程序在這個實驗中是由 docker run 的 command - ash 所產生的,最後可以透過以下命令去進入 container 中 PID 1 的程序:
| |
然後按個 enter,殭屍程序就會被回收了 。
結果比較
| 有 wait | 沒 wait |
|---|---|
| 由其父程序進行等待並回收 | 由 PID 1 的程序 init(1) 接收子程序,並自動加入 wait 去結束殭屍程序 |
| 老爹給你靠 | 老爹跑路,隔壁老王好心收養 |
總結
- 原本只是要紀錄怎麼樣同時下命令,結果想要弄個模擬實驗就會挖更多坑,不過也算比以前更深入一點點探討運作過程中的原理,速速妹!
參考資料
- Symmetric Multi-Processing - Linux kernel concurrency sources
- busybox - procps/top.c
- Linux 中 Sleep 和 Wait 命令的使用方式
- LINUX 學習日誌 - 把命令放到背景執行
- Background, zombie, daemon and without ctty - are these concepts connected?
- How do you run multiple programs in parallel from a bash script?
- time(1) — Linux manual page
- wait(2) — Linux manual page
- docker attach
- Concurrency 程式設計 - HackMD